Henry 2K
TR QSK Upgrade
By: NE7X - 05/01/2011
Replace the slower mechanical T/R relay in the Henry 2K with high speed Gigavac model GH1 and GH3 (datasheet) 5KW 6ms 26VDC SPDT vacuum relays.
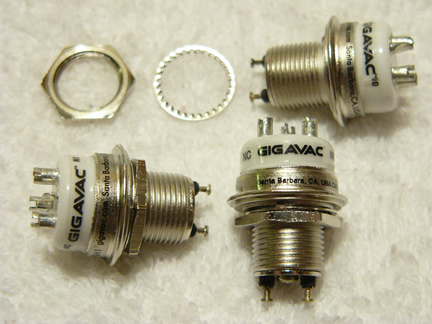
Two GH1 (RF) and One GH3 (HV-BIAS)
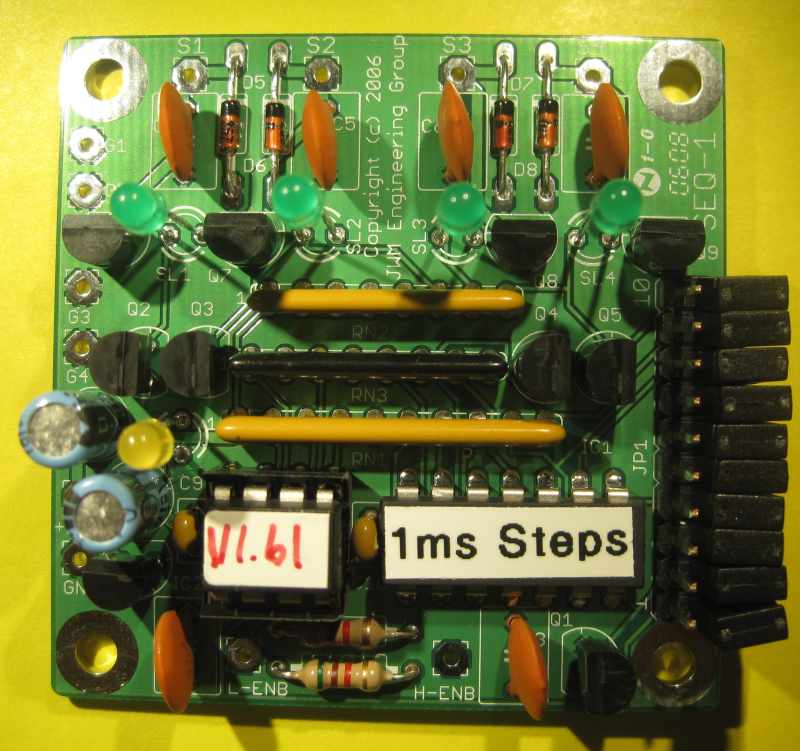
To accomplish sequencing for the vacuum relays, add a JWM Engineering Group four step port programmable SEQ-QSK T/R Sequencer.
PROCEDURE:
RF Deck Removal
Remove AC power
Remove top RF deck cover
Remove 3-400 tubes and chimes
Remove chassis power supply bottom front cover
From inside bottom power supply, disconnect HV cable and 8 pin octal plug from top RF deck
From inside bottom power supply, disconnect fan & AC cables attached to two feed through capacitors going to the top RF deck
From inside the RF deck, along the outer edge, remove nine (9) sheet-metal screws
Remove three (3) screws on chassis rear, next to RF coax connectors
Lift the RF deck off the power supply pedestal
With RF deck up-side-down, remove the bottom RF deck cover

Henry 2K RF deck (upside down) on workbench with bottom RF cover removed

Original Mechanical TR Relay

Original Mechanical TR Relay Removed
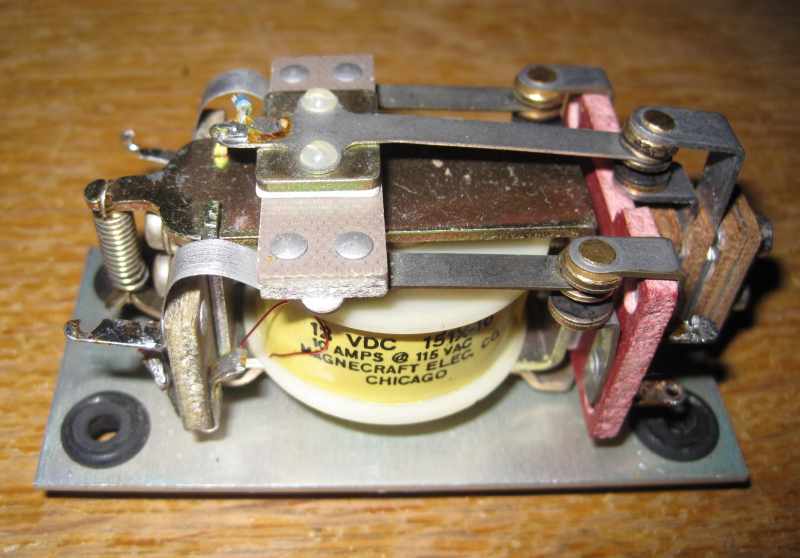
Original Mechanical TR Relay and mounting Plate
Remove the relay from mounting plate

Original Mechanical TR Relay Plate
Re-Use to mount Vacuum Relays - Make three 5/8 inch (18mm) Holes
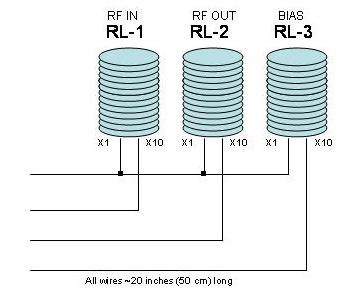
Vacuum Relay Wiring Diagram
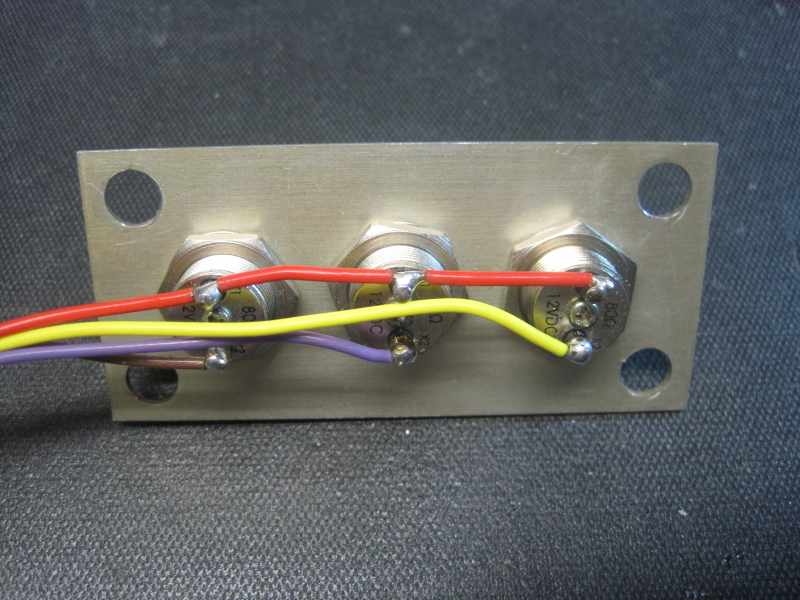
Mount Vacuum Relays and Wire
Install four new rubber grommets (optional to reduce noise vibration)

Mount Vacuum Relay in Location of Original Mechanical Relay

Top View of Vacuum Relays Mounted
Route wires to rear of chassis

Wire Vacuum Relays to SEQ-QSK
Relays are +26VDC and SEQ-QSK Sequencer is +12VDC
Use LM7812 to reduce the +26V to +12V for the SEQ-QSK


Mount the LM7812 and SEQ-QSK to the bottom cover of the top RF deck

LM7812, two .01uF caps and SEQ-QSK Sequencer
Reassemble the top RF deck to the power supply pedestal. Reference the RF deck removal procedure in this document, perform steps in reverse order.

Connect HV plug, 8 pin octal plug, FAN and AC power wires to top RF deck feed through capacitors.
View of LM7812, two .01uF caps and SEQ-QSK Sequencer after RF deck has been reinstalled.

The internal +26VDC power supply in the Henry 2K is not regulated. When the +26V HV Mercury Relay is engaged, the +26V supply drops to approximately +18V. This is low to reliably power the vacuum relays. Add a +24VDC computer laptop AC power supply to the bottom power supply deck.

Note the two yellow wires
Top yellow wire goes to HV Mercury Relay
Bottom yellow wire goes to vacuum TR relays and SEQ-QSK (pin #4 of 8 pin octal plug)
The laptop 120VAC adapter leads are the two back wires, bottom right/left lugs.

Rear of the Henry 2K, optional Inhibit Loopback RCA plug added
(This is SEQ-QSK S4 output)
SEQ-QSK Programming
Power off the amplifier
Remove bottom front power supply cover
Add jumpers to pins 1<=>6 as described in the SEQ-QSK programming manual
Replace bottom front power supply cover
Power on FILAMENT power switch, wait 10 seconds
Power on PLATE power switch, wait 10 seconds
Power off PLATE and then FILAMENT power switches
Remove bottom front power supply cover
Remove ALL jumpers from the SEQ-QSK
Replace bottom front power supply cover
Henry RF Amplifier Information Center Web Site
Additional Information about other Henry RF Amplifiers
Modifications & Upgrades
Happy QSKing
NE7X Web Site